


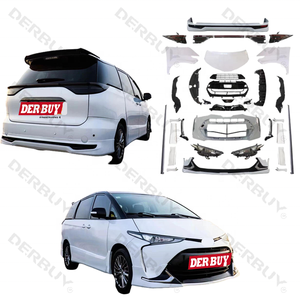
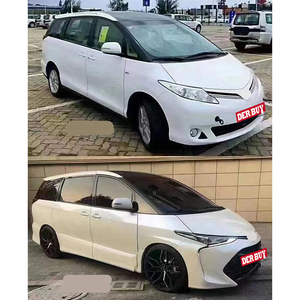
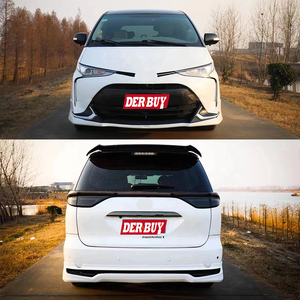
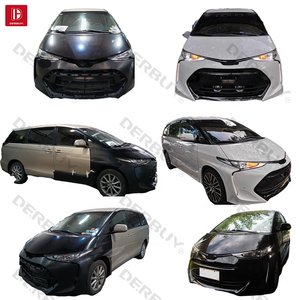


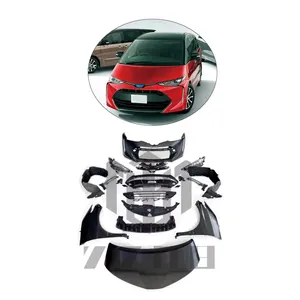


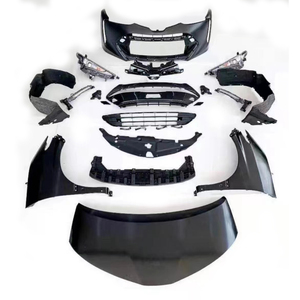


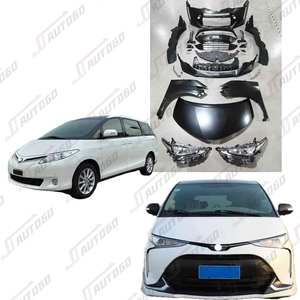
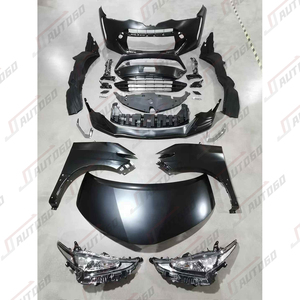
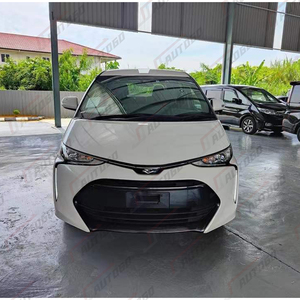
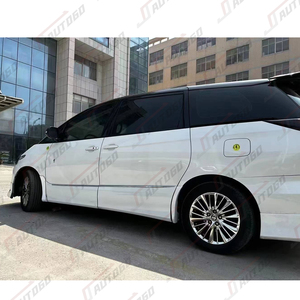
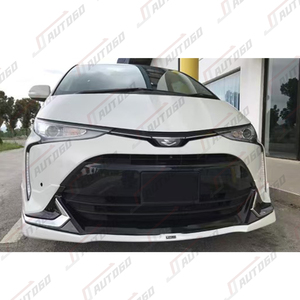
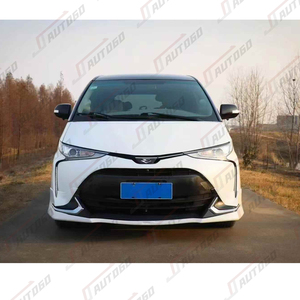


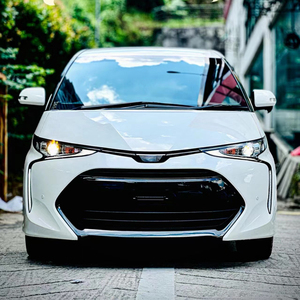


Types of Front Bumpers for Toyota Previa
A front bumper for Previa is a crucial component of a vehicle's front-end structure. It comes in various types, each designed to cater to different needs and preferences. Understanding the differences between bumper types will help you make an informed decision when replacing or upgrading your Previa's front bumper.
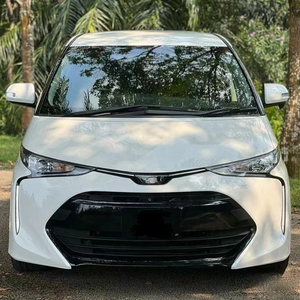
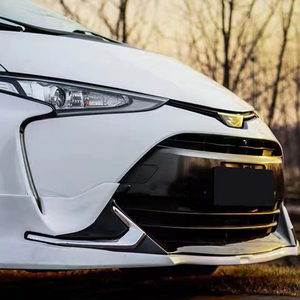
OEM Front Bumper
Original Equipment Manufacturer bumpers are designed specifically by Toyota for the Previa model.
Best for: Perfect fit, maintaining original appearance, and factory specifications
These bumpers ensure seamless integration with your Previa's design and all factory safety features.
Steel Front Bumpers
Heavy-duty steel construction offers maximum protection for off-road driving and challenging conditions.
Best for: Off-road enthusiasts, commercial vehicles, and maximum durability
The robust steel construction provides superior protection against impacts and collisions.
Plastic Front Bumpers
Lightweight and corrosion-resistant, commonly made from polypropylene that absorbs minor impacts.
Best for: Daily city driving, lightweight requirements, and basic protection
These bumpers handle typical parking bumps and minor collisions effectively.
Aluminum Front Bumpers
Balances weight and strength, improving fuel efficiency while maintaining protection.
Best for: Performance-oriented driving where weight matters but protection is needed
Popular for sports-oriented modifications where every gram counts.
Custom Front Bumpers
Designed and fabricated to meet specific requirements and personal preferences.
Best for: Personalization, specialized functions like winch mounting or extra lighting
Popular among enthusiasts who want unique styling or specialized functionality.
| Bumper Type | Weight | Durability | Cost | Best Application |
|---|---|---|---|---|
| OEM | Medium | Good | High | Factory restoration, maintaining original look |
| Steel | Heavy | Excellent | High | Off-road, heavy-duty applications |
| Plastic | Light | Fair | Low | Daily driving, city use |
| Aluminum | Light-Medium | Good | Medium-High | Performance vehicles, weight-conscious applications |
| Custom | Varies | Varies | High | Specialized needs, personalization |
Pro Tip: When considering aftermarket bumpers, verify that they meet local safety regulations and won't interfere with your Previa's airbag sensors or other safety systems.
Specifications of Front Bumpers for Toyota Previa
| Specification | Details | Importance |
|---|---|---|
| Compatibility | Specific to Previa model year and trim level | Critical - ensures proper fit and function |
| Material | Commonly plastic, steel, or aluminum | High - affects durability, weight, and performance |
| Design | Varies by manufacturer, model year, and purpose | Medium - affects aesthetics and functionality |
| Features | May include grill openings, fog light housings, sensor provisions | High - ensures compatibility with vehicle systems |
| Finish | Painted or coated to match vehicle or protect from corrosion | Medium - affects appearance and longevity |
| Weight | Ranges from 10-100 lbs depending on material and design | Medium - affects handling and fuel efficiency |
The specifications of a front bumper for Toyota Previa are crucial to consider when selecting a replacement or upgrade. Each specification contributes to the bumper's performance, appearance, and compatibility with your vehicle.
Important: Always verify the compatibility of a front bumper with your specific Previa model year before purchasing. Incorrect fitment can compromise safety features and vehicle performance.
Maintenance of Front Bumpers for Toyota Previa
Proper maintenance of your Toyota Previa's front bumper ensures longevity, maintains appearance, and preserves its protective capabilities. Following these maintenance practices will help keep your bumper in optimal condition:
Regular Cleaning
Clean your bumper regularly with mild car wash soap and a soft sponge or cloth to prevent accumulation of dirt, bugs, bird droppings, and tree sap.
Frequency: Weekly or after exposure to harsh conditions
Avoid: Harsh chemicals, abrasive cleaners, and pressure washers on plastic bumpers
Regular Inspection
Inspect your bumper for scratches, dents, cracks, fading, and rust to catch issues early before they worsen.
Frequency: Monthly and after any minor impacts
Look for: Cracks around mounting points, loose fasteners, and paint damage
Preventive Measures
- Practice careful parking with adequate space between vehicles
- Avoid exceeding towing capacity that could strain the bumper
- Apply protective wax or sealant to painted bumpers
- Install bumper guards in high-risk parking environments
Professional Care
- Seek professional inspection after significant impacts
- Have damaged bumpers repaired promptly to prevent further deterioration
- Consider professional detailing annually to maintain appearance
- Consult a specialist for bumper reinforcement if regularly driving in harsh conditions
Maintenance Tip: Apply UV protectant to plastic bumpers every 3-4 months to prevent fading and deterioration from sun exposure, especially if your Previa is regularly parked outdoors.
How to Choose Front Bumper For Toyota Previa
Selecting the right front bumper for Previa requires careful consideration of several factors to ensure proper fit, function, and appearance. Use this comprehensive guide to make an informed decision:
Compatibility & Fit
Verify the bumper's compatibility with your specific Previa model year and trim level.
Key considerations:
- Model-specific mounting points
- Provisions for existing sensors and lights
- Alignment with other body panels
Material & Durability
Choose a material that balances your needs for protection, weight, and longevity.
Options include:
- Plastic: Lightweight, affordable, absorbs minor impacts
- Steel: Maximum protection, heavier, potential for rust
- Aluminum: Balanced weight-to-strength ratio, corrosion-resistant
Purpose & Usage
Consider how you use your Previa and what conditions it typically encounters.
Usage scenarios:
- City driving: Lightweight, aesthetic-focused designs
- Off-road: Reinforced, heavy-duty options with recovery points
- Long-distance travel: Aerodynamic designs with integrated lighting
Budget & Value
Balance cost with quality and features to maximize value for your specific needs.
Price considerations:
- OEM: $200-$600+ (exact fit, factory quality)
- Aftermarket plastic: $100-$300 (budget-friendly)
- Custom/specialized: $400-$1,000+ (unique features)
- Additional costs: Paint matching, professional installation
Selection Tip: If safety is your priority, look for bumpers that maintain or enhance your Previa's crash absorption capabilities. Some aftermarket bumpers may look robust but could actually compromise the vehicle's designed crumple zones.
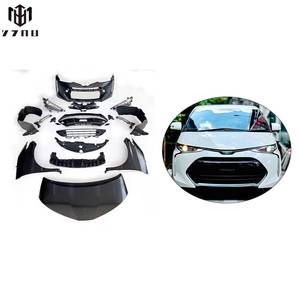
DIY Installation Guide: Replacing Toyota Previa Front Bumper
Replacing your Toyota Previa's front bumper can be accomplished as a DIY project with the right tools and careful attention to detail. This step-by-step guide will help you complete the installation safely and effectively.
Required Tools and Materials
Socket wrench set
Phillips screwdriver
Torx screwdriver
Trim removal tool
New front bumper
Bumper reinforcement (if applicable)
Bumper fasteners
Work gloves
Safety glasses
Installation Process
Step 1: Prepare the Vehicle
Park on level ground, engage parking brake, disconnect battery, and open the hood for access.
Step 2: Remove Fasteners
Locate and remove all bolts securing the front bumper. Check wheel wells, under the bumper, and along the top edge. If your Previa has a bumper reinforcement, remove those fasteners as well.
Step 3: Disconnect Electrical Connections
Carefully disconnect any electrical connectors for fog lights, turn signals, or sensors by gently pulling the connectors apart.
Step 4: Remove Trim and Covers
Use a trim removal tool to carefully pry off any plastic trim pieces or covers that may be concealing additional fasteners.
Step 5: Remove the Old Bumper
With all fasteners and connections removed, carefully pull the bumper away from the vehicle. Start from one side and work your way across to avoid breaking any remaining clips.
Step 6: Prepare the New Bumper
Unpack the new bumper and transfer any components from the old bumper (such as fog lights, sensors, or trim pieces) if needed.
Step 7: Install the New Bumper
Carefully align the new bumper with the mounting points and gently push it into place. Ensure all clips and alignment pins seat properly.
Step 8: Secure the Bumper
Reinstall all fasteners, starting from the center and working outward to ensure proper alignment. Tighten to manufacturer specifications without overtightening.
Step 9: Reconnect Electrical Components
Reconnect all electrical connectors for lights and sensors, ensuring they click firmly into place.
Step 10: Final Check
Inspect the installation for proper alignment, secure fasteners, and functioning electrical components. Test all lights and sensors before completing the job.
Safety Warning: Always disconnect the vehicle's battery before working with components that may have electrical connections or airbag sensors. This prevents accidental deployment or electrical issues during installation.
Frequently Asked Questions
Q1: How can I ensure the longevity of my Toyota Previa front bumper?
Regular maintenance is key to extending your bumper's lifespan. Wash it frequently to remove road grime and salt, especially in winter or coastal areas. Apply UV protectant to plastic bumpers to prevent fading and deterioration. Repair minor damages promptly before they worsen, and consider protective films for areas prone to rock chips. Parking carefully and maintaining proper distance from other vehicles will also help avoid unnecessary impacts.
Q2: What is the function of the front bumper support or reinforcement bar?
The bumper reinforcement bar is a critical structural component that sits behind the visible bumper cover. Its primary purpose is to absorb and distribute impact energy during collisions, protecting both the vehicle and its occupants. The reinforcement works with your Previa's crumple zones as part of the engineered safety system. When replacing your bumper, it's essential to inspect this component for damage and replace it if necessary, as a compromised reinforcement bar significantly reduces your vehicle's crash protection.
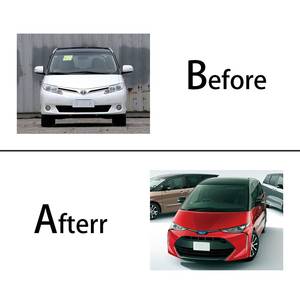
Q3: Can a front bumper for Previa be painted to match the vehicle's color?
Yes, most front bumpers for the Toyota Previa can be painted to match your vehicle's color. Many aftermarket bumpers come unpainted (often in black plastic or primer gray) and require professional painting for a factory-matched appearance. The painting process typically involves surface preparation, primer application, color coating, and clear coat. For best results, use a professional automotive paint shop that can precisely match your Previa's paint code and provide a warranty on their work. DIY painting is possible but challenging to achieve professional-quality results.
Q4: What are some common materials used in front bumpers for Toyota Previa?
Toyota Previa front bumpers are typically made from one of three primary materials:
- Thermoplastic (ABS/Polypropylene): The most common material for modern bumper covers, offering flexibility, impact resistance, and lightweight properties.
- Steel: Used primarily for bumper reinforcements and heavy-duty aftermarket options, providing maximum strength and impact protection.
- Aluminum: Becoming more popular for weight-conscious applications, offering a good balance of strength and weight reduction.
Each material has specific advantages in terms of cost, weight, durability, and impact absorption characteristics.
Q5: How do I know if my Previa bumper needs replacement or just repair?
Determining whether to repair or replace your Previa's bumper depends on the extent and type of damage:
- Consider repair for: Minor scratches, small cracks, light scuffs, or superficial damage that doesn't affect structural integrity or mounting points.
- Replacement is recommended when: There are large cracks or splits, damaged mounting points, compromised structural integrity, multiple previous repairs, or if repair costs approach replacement costs.
A professional assessment can help determine the most cost-effective and safe option for your specific situation.


 浙公网安备 33010002000092号
 浙B2-20120091-4